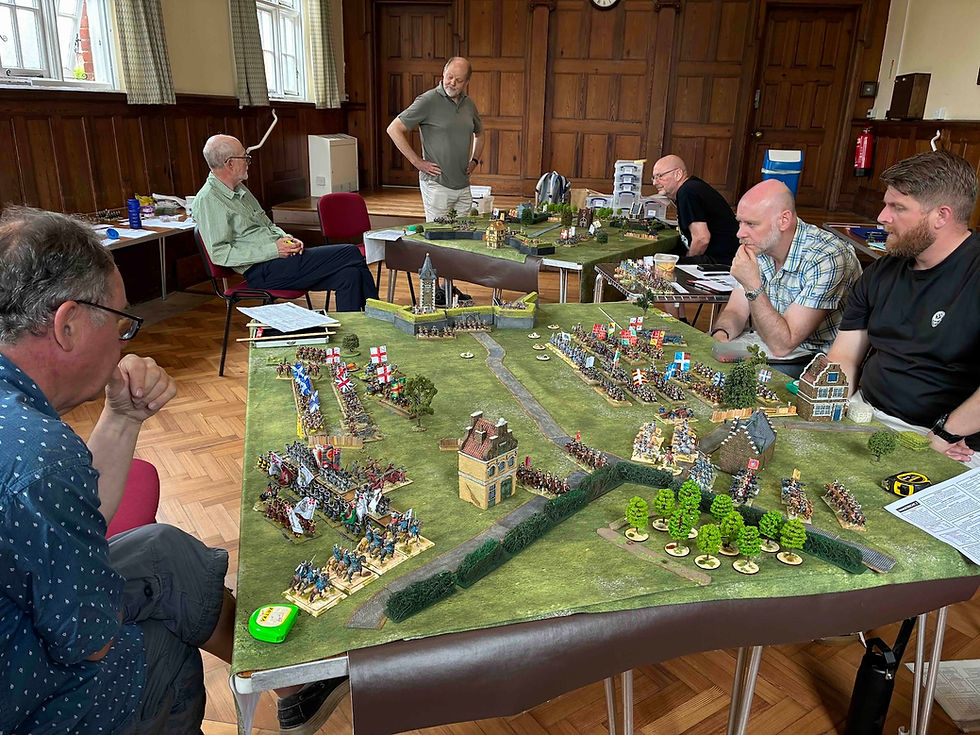
The Battle of Flodden Wargame
- Simon MacDowall
- Feb 27, 2022
- 3 min read
Outnumbered by the Scots the English army needed to prod the enemy into attacking, hoping that they could disorder the massive Scottish pike blocks before they closed into hand to hand combat.

Our re-fight of Flodden with 28mm miniatures was played out using The Tree of Battles rules which had been so successful at the Society of Ancients Bosworth Battle Day. I took the role of the Earl of Surrey (a veteran of Bosworth) commanding the English army, ably assisted by the Lord Admiral, holding our right wing. Three Scottish players took the roles of the Earls of Argyll and Lennox (right), King James IV (centre), and the Earls of Errol, Home and Huntly (left). The reluctant reserve under the Earl of Bothwell would only come into play with a favourable die roll.
As it turned out we did not need to prod the Scots into attacking. King James’ sense of chivalry demanded that he accept our challenge to battle and the Scots advanced in echelon from the left. Home’s pikemen became slightly disordered as they crossed boggy ground but they were far enough away from our lines for this not to be too much of a problem for them. I realised that we needed to advance our archers to slow their movement and to inflict casualties as the other pike blocks approached the boggy ground.

This worked well despite the fact that it left many of our units beyond the command radius of their captains with the result that on several occasions they did not move when we wanted them to. Our archery was not as effective as we would have liked, due to the heavy armour of the Scottish front ranks. However the combination of archery and artillery fire as the pikemen moved across the boggy ground meant that they soon began to fall into disarray. Although the Scots had more guns than the English, most of their guns were heavy and cumbersome, only able to fire every second turn.

Home’s pikemen, supported by Huntly’s highlanders met with initial success against Edmund Surrey’s men holding our right but Home was severely wounded and could no longer inspire his men to greater deeds. The Lord Admiral then moved his marines up to threaten their flank while Eroll’s pikemen took heavy casualties from archery and artillery, leaving them floundering in disarray in the boggy ground and unable to advance further to support Home who was now isolated on the Scottish left.

In the centre, King James personally led forth three large pike blocks up against the position held by Sir Marmaduke Constable and the Earl of Surrey. Thanks to the bog, effective artillery fire and less effective archery, by the time they came into charge reach of the English their ranks were wavering and close to falling into disarray.

The Scots refused their right wing. Here it looked like the English had an opportunity to drive in the Scottish flank to encircle King James’ formidable centre. Lord Dacre therefore moved forward with his mounted men at arms supported by Border Reivers and a small number or archers. Sir Edward Stanley arriving late on the field (a family trait) also eventually came in on that wing. The English advance was helped by the fact that this flank turned out to be all good going with no boggy ground (this unknown to players in advance — see previous post). What we had not counted on was the fighting spirit of the Highlanders and Mercenary French Captains. Despite being hit by a mounted charge on their flank, Argyll and Lennox held firm, captured (then executed Lord Dacre) and pushed Stanley back.

Despite this success the rest of the Scottish army was in serious trouble. The Earl of Surrey led a charge to meet that of King James’s pikemen who were wavering, then fell into disarray. As his rear rankers began to melt away, the Scottish king was surrounded and killed by Surrey’s men. On the other flank, despite a valiant charge by Huntly’s highlanders, Home’s lowland pikemen were hit in the flank by the Lord Admiral’s marines and broken. Bothwell’s reserve had been activated but too late to influence the battle.
With the Scottish king slain and the pub beckoning for a post battle de-brief, we called time. The result of our game had been very close to the historical outcome although the English border horse did not loot their own baggage train, having rolled successfully to avoid this possibility which Gary Kitching had built into the scenario.


The troops that were painted specially for the battle, for both sides, were the real stars of the show!