Hereward re-awakes
- Simon MacDowall
- Dec 5, 2022
- 3 min read
Leaving aside my Ancient Greeks for a while, I recently found myself embroiled in an attempt to suppress Hereward the Wake’s East Anglian resistance to the Norman conquest in the 1070s.

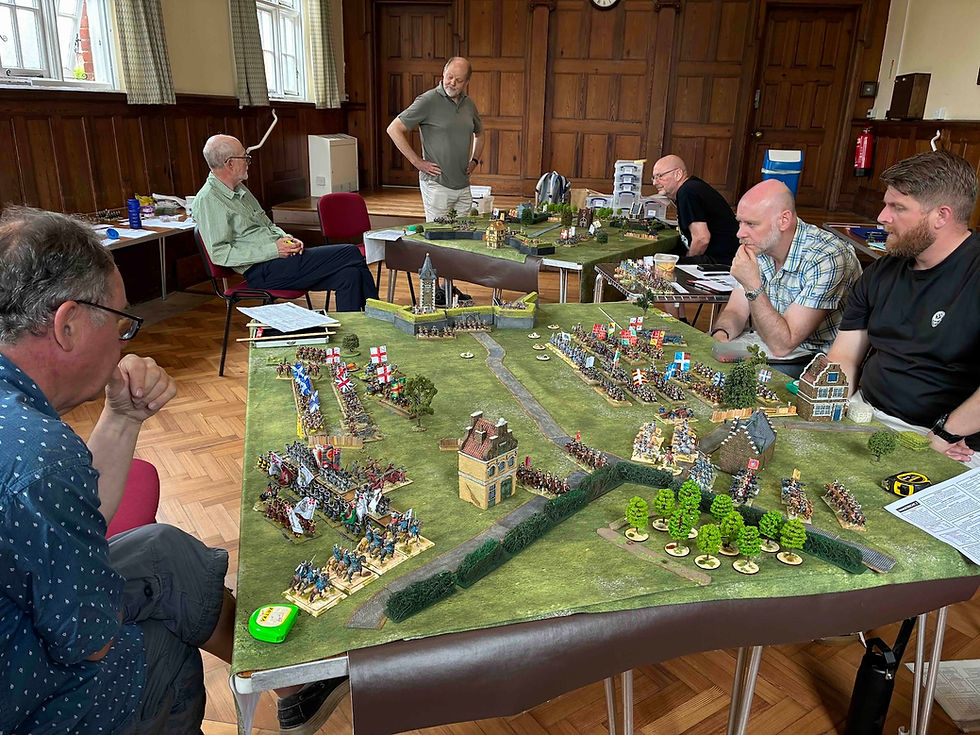
The semi-historical game scenario (using Comitatus rules) was set amongst the marshes of Ely where Guido le Renard was holding a motte and bailey castle with a small garrison. It was stuffed full of provisions that Guido had collected from the surrounding farms in an attempt to starve the English rebels into compliance with Norman rule.
Hereward the Wake had joined forces with Edwin of Mercia and they were advancing on Ely to seize the supplies. Learning of this, William de Warenne and Ivor Taillebois led a Norman force to reinforce Guido and crush the rebellion.

The Saxons had to navigate their way along a narrow causeway and then cross a bridge in order to reach the Norman fortification. Although his garrison was vastly outnumbered by the highly motivated Saxons, Guido decided to make an attempt to hold the bridge for as long as he could, counting on the fact that the Saxons would not be able to bring their superior numbers into play in a fight over the bridge. Every turn he could delay them would give more time for the Norman reinforcements to arrive.

Hereward personally led his men in a ferocious charge across the bridge. The Norman garrison wavered and fell back. They continued to offer resistance but they were no match for the veteran Saxons and before long they were sent running back to the fort. The Saxon success, however, turned to disaster when Hereward was killed in the fighting. This sent shock waves through the Saxon ranks. Guido led his household cavalry forward to exploit it.
The death of Hereward would have ended the rebellion and so it effectively ended the game after only a couple of turns. As we had a good several hours playing time still available, we decided to give it another go.

This time the Saxons were able fight their way across the bridge with Hereward still alive and well. When Guido led his knights in a charge to delay the Saxon advance it was Guido’s turn to feel the hand of fate. He was not killed but suffered a serious wound which greatly hampered his command abilities.

The Saxons surged forward, driving the Normans back to their fortifications. Some of the Saxons breached the outer palisade and began to gather up the supplies to take back with them. Meanwhile some men had found a secret way through the marshes on the Norman right.

The Saxons had cleared the bridge but they had a traffic jam stacked up behind the lead unit as the whole army had to advance across a narrow causeway and cross the bridge before they could break out into the open and bring their numbers to bear.

The Norman reinforcements were similarly hampered by also having to advance along a causeway through the marshes. The delay caused by Guido’s defence of the bridge did give them time to bring up their lead units to his aid but they could only do so one unit at a time on a narrow frontage.

William de Warenne, leading the Norman reinforcements, charged Hereward’s household as they were working their way around the southern side of the castle. The attack was unsuccessful and the Norman knights were forced to retire.
Meanwhile it appears as if a Norman defender on the battlements of the castle has been hit by an arrow!

Sending infantry forward to block Hereward’s advance on the south, William moved to the north side of the castle. Here he was joined by Ivor Taillebois’ household knights. Together they led a devastating charge against the lead Saxon unit on that flank and succeeded in breaking them.
In this second game fate was against the Normans and William was killed in the fighting. The morale impact on the Normans was less than it had been when Hereward had been killed in the first game as Ivor was there to take command and he was a more inspirational leader than William.
At this point we called the game as a Norman victory (for Ivor if not for William). The Saxons had only managed to get a few of their lead units into battle and had no chance of getting any of the supplies back safely. Although they had fought valiantly it had probably been a nearly impossible task from the start. The Saxon force was still largely in tack so, although they had failed to get the much needed supplies, perhaps their resistance will continue.


Oh yes, the rebellion WILL continue! Until Edwin, the one true king, is crowned!
An excellent report, Simon.
As I played the role of Hereward I have to agree with Richard, below, but it was still an enjoyable day with good company and some cracking looking models.
Once again I managed to get myself killed! I really am becoming quite adept at it!!!!!!!
It's habit that needs to be broken and quickly! :0)
As one of the Saxon players (Edwin, the true King of England...) I thought our main problem was lack of command & control. Hereward was naturally leading his household troops to press back the Normans, first Guido's small command and then the lead elements of the reinforcements, which meant his other units were left to their own devices. More often that not they failed to show any initiative and stood still rather than pressing on to create the space for Edwin and his troops to join the battle. If Hereward's Lesser Fyrd and been a little smaller (it was a 6 stand unit), they wouldn't have blocked the bridge when they came to a grinding halt yet would have still…